Test methods for EN 13501-1 CLASS A1
Requirements:
| Class | Test method(s) | Classification criteria | Additional classification |
|---|---|---|---|
| A1 | EN ISO 1182 a and | △T≤30℃, and △m≤50%, and tf=0(i.e. no sustained flaming) | - |
| EN ISO 1716 | PCS≤2.0MJ/kg a and PCS≤2.0MJ/kg b c and PCS≤1.4MJ/m2 d and PCS≤2.0MJ/kg e | - | |
| a For homogeneous products and substantial components of non-homogeneous products. b For any external non-substantial component of non-homogeneous products. c Alternatively, any external non-substantial component having a PCS ≤ 2,0 MJ/m2 , provided that the product satisfies the following criteria of EN 13823: FIGRA ≤ 20 W/s, and LFS < edge of specimen, and THR600s ≤ 4,0 MJ, and s1, and d0. d For any internal non-substantial component of non-homogeneous products. e For the product as a whole. | |||
Test Method:
1. EN ISO 1182: Reaction to fire tests for products — Non combustibility test
7.4 Standard test procedure
7.4.1 Stabilize the furnace
If the recorder used does not allow a real-time calculation, the temperature stabilization shall be checked afterwards. If the conditions specified in 7.2.4 are not satisfied, the test shall be repeated.
7.4.2 Before starting the test, ascertain that the whole equipment is in good working order, for example, that the stabilizer is clean, the specimen insertion device is working smoothly and the specimen holder exactly occupies the required position in the furnace.
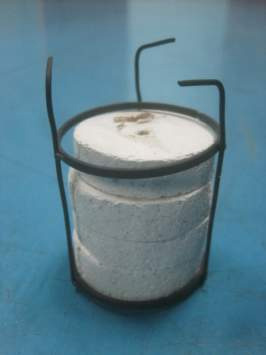
7.4.3 Insert one specimen prepared and conditioned into the specimen holder.
7.4.4 Place the specimen holder in the furnace, taking not more than 5 s for this operation.
7.4.5 Start the timing device immediately following the insertion of the specimen into the furnace.
7.4.6 Record throughout the test the temperature measured by the furnace thermocouple and, if required (see Annex C), the temperature measured by the surface thermocouple and centre thermocouple The temperature measured by the furnace thermocouple shall be corrected according to the calibration
7.4.7 Carry out the test for a period of 30 min.
If final temperature equilibrium, which is achieved when the temperature drift (linear regression) as measured
by the furnace thermocouple does not exceed 2 °C over a period of 10 min, has been reached by the thermocouple at this time (30 min), the test shall be stopped. If final temperature equilibrium has not been reached by the thermocouple at 30 min, continue the test, checking for final temperature equilibrium at 5 min intervals thereafter. Stop the test once equilibrium is established by the thermocouple or after 60 min and note the duration of the test. Then remove the specimen from the furnace. The end of the test is the end of the final
5 min interval or 60 min (see Annex D).
If the recorder used does not allow for real-time calculation, the end recordings shall be checked after the test.
If the requirements set out above are not satisfied, the test shall be repeated.
If additional thermocouples are used the test shall be stopped when final temperature equilibrium is achieved for all thermocouples used or after 60 min.
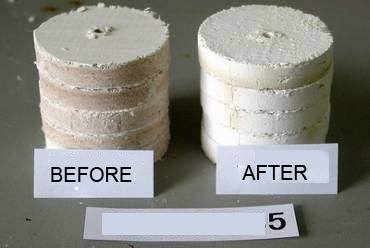
7.4.8 After cooling to ambient temperature in a desiccator, weigh the specimen. Recover any char, ash or other debris, which breaks off the specimen and falls down the tube, either during or following the test, and include this as a part of the unconsumed specimen.
7.4.9 Test all five specimens as given in 7.4.1 to 7.4.8.


2. EN ISO 1716: Reaction to fire tests for products — Determination of the gross heat of combustion (calorific value)
8.3 Standard test procedure
WARNING — Aluminium or other metallic components of a product shall not be tested in the bomb calorimeter at the risk of serious injury to the operator due to overheating and/or overpressure causing the bomb calorimeter to explode.
Switch on the apparatus at least 1 h before testing.
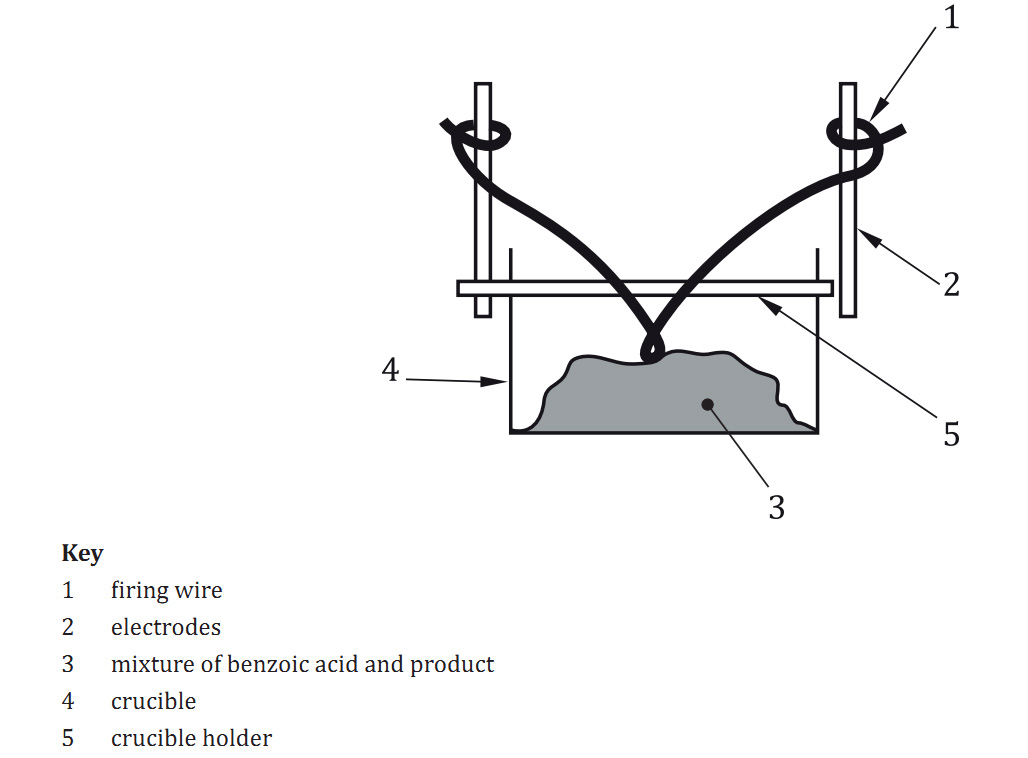
8.3.1 Place the specimen in the crucible.
8.3.2 Place the crucible in the holder.
8.3.3 Attach the firing wire and loop it to touch the specimen.

8.3.4 Check that a good electrical contact is ensured between the two electrodes and the firing wire
8.3.5 Place the holder in the body of the calorimetric bomb.
1 ml of de-ionized water may be introduced into the body of the calorimetric bomb to absorb any acid gases produced.
8.3.6 Adjust the lid and tighten onto the body of the bomb. Connect the bomb to the bottle of oxygen, then carefully open the bottle's tap and fill the bomb until a pressure of 3,0 MPa to 3,5 MPa is achieved (if not achieved automatically), without removing the air already there.
8.3.7 Place the bomb in the calorimeter vessel.
8.3.8 Introduce into the calorimeter vessel a quantity of distilled or demineralized water that is sufficient to cover the upper surface of the bomb cap and weigh. This quantity of water shall be the same, to the nearest 1 g, as that used in the calibration procedure (see 8.2.1) (if not achieved automatically).
8.3.9 Check that the bomb does not leak (no continuous stream of bubbles).
8.3.10 Place the calorimeter vessel in the water jacket.
8.3.11 Proceed as follows:
a) Set the temperature-measuring device and start the stirrer and the timing device (if this is not achieved automatically).
b) Bring the water in the calorimeter vessel to a temperature that is approximately equal to that of the jacket.
Note the temperature of the water in the calorimeter vessel at least every minute until successive readings are identical within ±0,01 K for at least 10 min (if this is not achieved automatically). Note this temperature as the initial temperature (Ti).
NOTE 1 With some automatic apparatus, the manufacturer of the apparatus states that a shorter time than 10 min is sufficient. If this is the case, this reduced time may be used on condition that the manufacturer's information is checked and documented by the laboratory.
c) Close the electric circuit to cause combustion.
d) For an adiabatic calorimeter only: during the rapid temperature-rise phase of the water in the calorimetric vessel, the temperature of the water in the jacket shall be maintained as close as possible to that of the calorimetric vessel; the two temperatures shall be to within ±0,01 K as they get nearer to the maximum temperature. Note the temperature of the water in the calorimetric vessel at least every minute until successive readings are identical within ±0,01 K for at least 10 min. Note this temperature as the maximum temperature (Tm).
NOTE 2 These processes can be automated in designs of commercially available equipment.
e) Remove the bomb from the calorimeter, leave to stand for 10 min, then slowly reduce the pressure. Open the bomb. Verify that complete combustion has taken place, i.e. that there is neither a sooty deposit inside the bomb nor traces of residual carbon on the sides of the crucible. Rinse and dry the bomb.
f) If complete combustion has not occurred, a different method of test specimen preparation could be tried.